


You can manage your project tasks using the Project Tasks tab in your Ya.me. These projects are the ones where you have an active assignment for at least one day within the selected period.
Selecting a Period
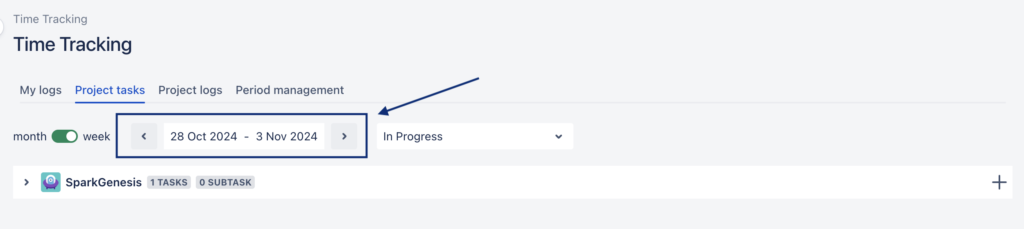
- At the top of the Project Tasks tab, you will find a time picker.
- By default, the current month is selected.
- You can change the period to any desired timeframe without limitations by clicking on the time picker and selecting your desired dates.
Creating a New Task
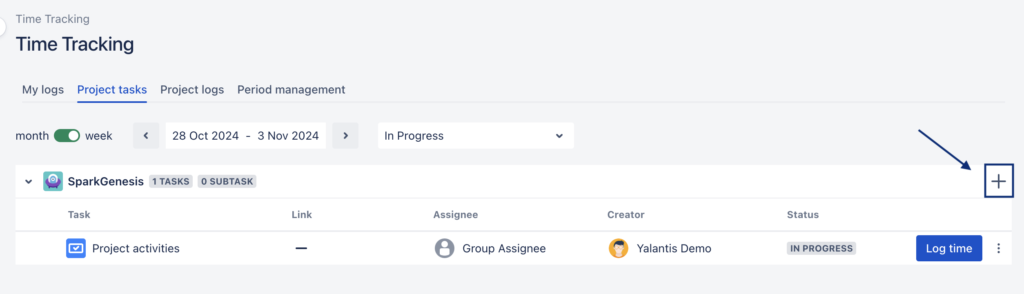
- Initiate Task Creation:
- Within the expanded view of a project, click on the “+” button.
- Fill in Obligatory Fields:
- Name: Enter the task name. Latin and Cyrillic are supported.
- Assignee: Select an assignee from the list of associates with active assignments on the project, or choose “Group Assignee.”
Note! Assignee doesn’t limit the possibility of logging time.
- Status: Choose between “In Progress” or “Done.”
Note! Status doesn’t limit the possibility of logging time.
- Creator: This field is automatically filled with creator’s name.
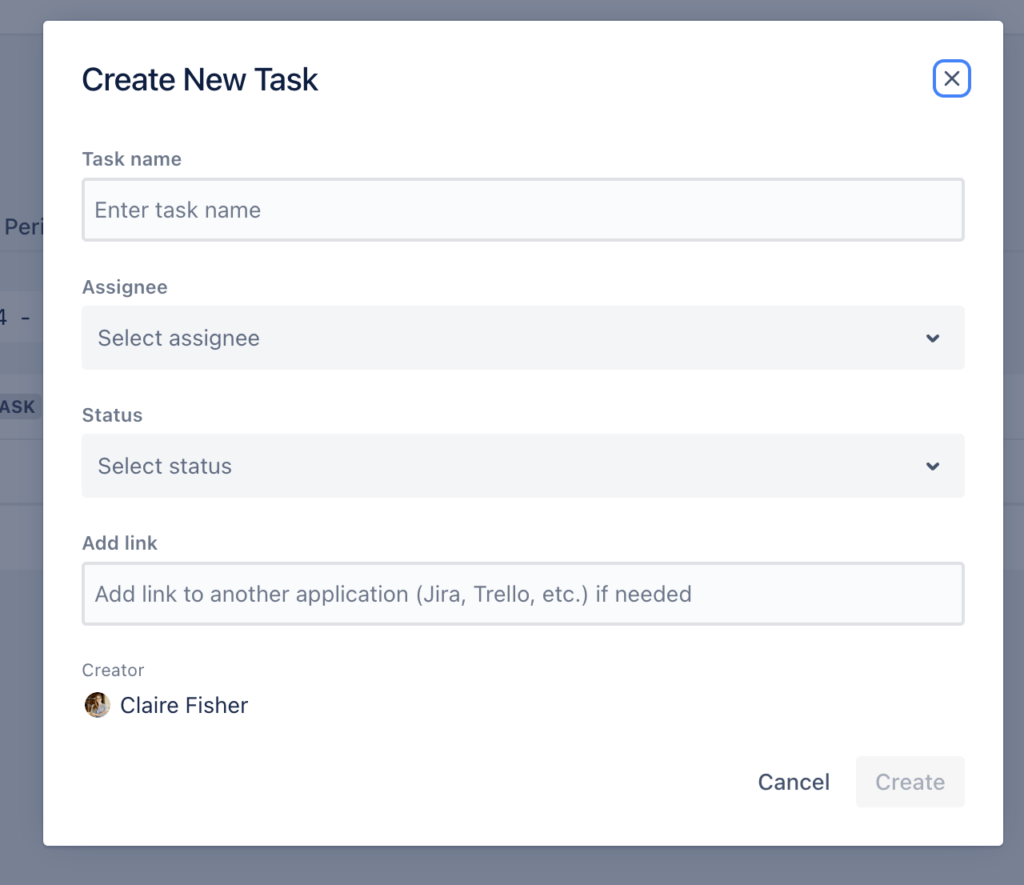
- Fill in Optional Fields:
- Link: Add a link to a related task or issue in another application (Jira, Trello, Notion, etc.).
- Save the Task:
- Click “Save” to create the task. The task will automatically be assigned a number (1 for the first task, 2 for the second, and so on) and appear at the top of the list within the project.
Creating a New Subtask
- Initiate Subtask Creation:
- Within the expanded view of a task, click the “Add subtask” button on the burger menu.

- Fill in Obligatory and Optional Fields:
- See the point about creating a task
- Save the Subtask:
- Click “Save” to create the subtask. The subtask will automatically be assigned a number within the task list and appear at the top of the list within the task.
Edit task
- Initiate Task/Subtask edition:
- Within the expanded view of a task, click the “Edit task” or “Edit sub-task” button on the burger menu.
- Fill in Obligatory and Optional Fields:
- See the point about creating a task.
- Save the changes:
- Click “Save” to edit the sub-/task.
Delete task
Note! You need to have the permission “Delete task”.
Note! If the task or subtask has logged time entries, you cannot delete it. To resolve this, you must delete the logged time before attempting to delete the task or subtask again.
Note! If at least one subtask has logged time, you cannot delete the parent task.
- Initiate Task/subtasks Deletion:
- Within the expanded view of a project, find the task you want to delete.
- Click on the “Delete Task” button next to the task on the burger menu.

- Confirm Task Deletion:
- A confirmation window will appear
- Click “Confirm” to proceed with the deletion.
- If there are no logged time entries, the task and all related subtasks will be deleted.