


An assignment is a piece of work time allocated to the Associate for the project.
There are 3 ways to assign an associate to a project:
- Use the ERP Member page
(this variant is used for the creation of the first user’s assignment) - Use Planner
- Create and Accept request
Use Planner
Pre-condition: The Associate should already have at least one assignment.
| ℹ️The following permissions are needed there: View Planner View external rates in assignments Manage external rates in assignments View ERP projects View profiles of ERP members Manage all assignments (on demand) |
There is a step-by-step process for assigning an associate to a project
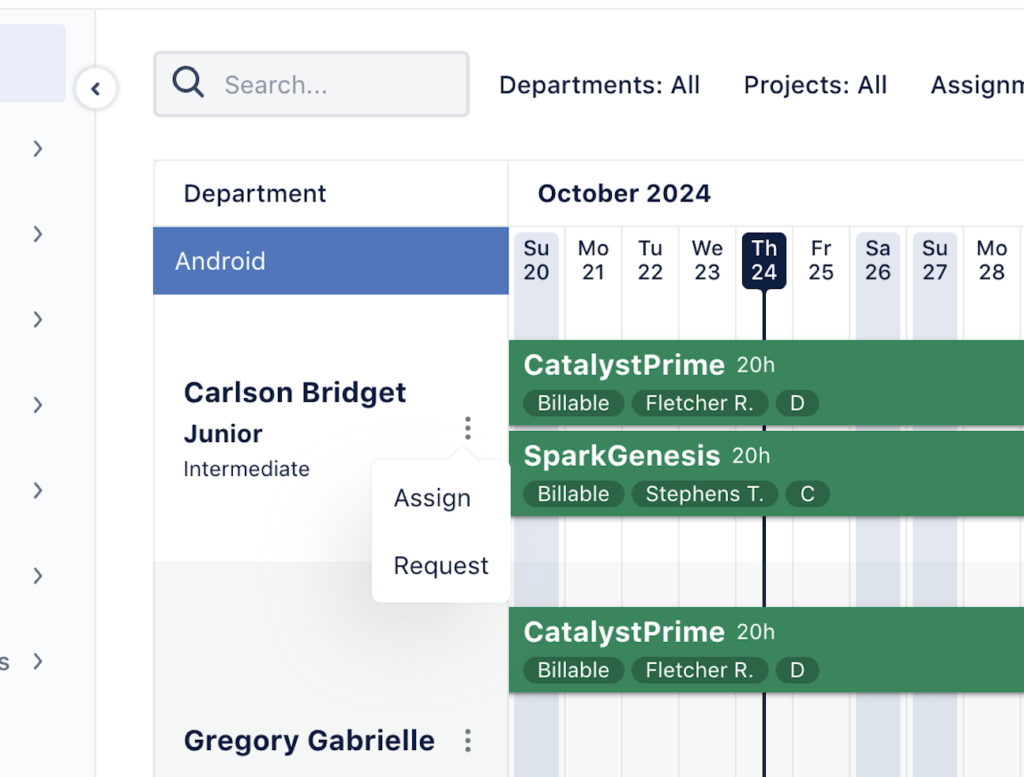
- Navigate to the Planner: Start by going to the “Planner” section of the ERP.
- Find the Associate: Locate the associate you want to assign to a project. You can use the search function to find the associate quickly.
- Open the Assignment Menu:
- Click on the burger menu (three vertical dots) next to the associate’s name.
- Select “Assign” from the dropdown menu. The admin panel will appear on the right side of the page.
- Select the Project:
- Choose the appropriate project from the project dropdown list.
- The Project Manager fields will be automatically populated based on the selected project.
- Project Status field is filled with “Billable” value by default, but you can change it by selecting the appropriate option. (see assignment statuses overview)
- Set Start and End Dates:
- Use the date pickers to select the Start Date and End Date for the associate’s assignment.
- Set Loading hrs/week: Loading is a planned time allocated to the project to fill in the Loading field
- Leave a Comment (Optional): If needed, you can leave a comment in the provided field.
- Set the Rate:
- Project Rate: Choose this option if the project rate applies to the assignment. The value is taken from the project settings (see ERP Projects)
| 📓 If the project rate is changed in the Projects settings, the saved value isn’t changed in the assignment. To apply a new rate, you need to set any custom rate and after that set the Project rate again. |
- Custom Rate: Select this if the current external rate is different and needs to be set specifically for this assignment.
- Click “Assign”: Once all details are filled in, click the “Assign” button to complete the assignment process.
By completing these steps, the created assignment is displayed on the Planner.
Please be careful with the total loading value for associates per week, it isn’t recommended to set it to more than 40 hours per week.
Use ERP Member page
Note! This flow can be used for the creation of the first assignment.
| ℹ️The following permissions are needed there: View Planner Manage ERP members View profiles of ERP members View external rates in assignments Manage external rates in assignments Manage all assignments (on demand) |
There is a step-by-step process for assigning an associate to a project
- Navigate to Teams → ERP Members: Go to the “Teams” section and select “ERP Members”.
- Find the Associate: Locate the associate you want to assign. You can use the search function to quickly find the associate.
- Open the Assignment Menu:
- Option 1: Click on the burger menu (three vertical dots) at the end of the associate’s row and select “Assign”.
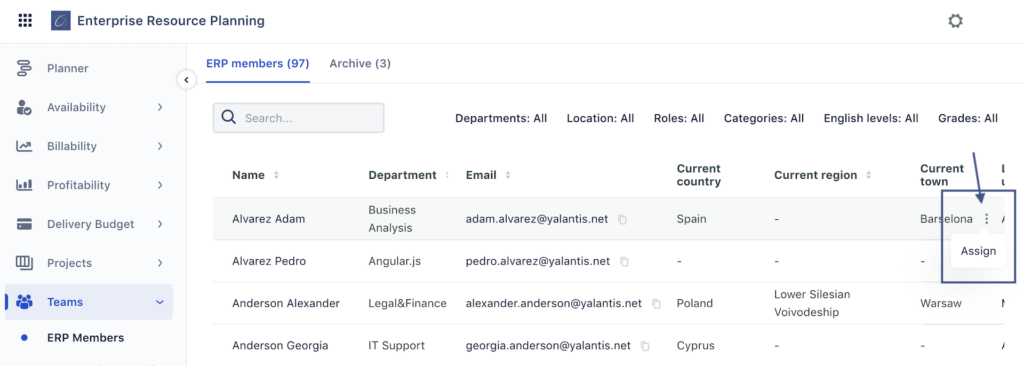
- Option 2: Click directly on the associate’s row, then click the “Assign” button in the top-right corner of the page.
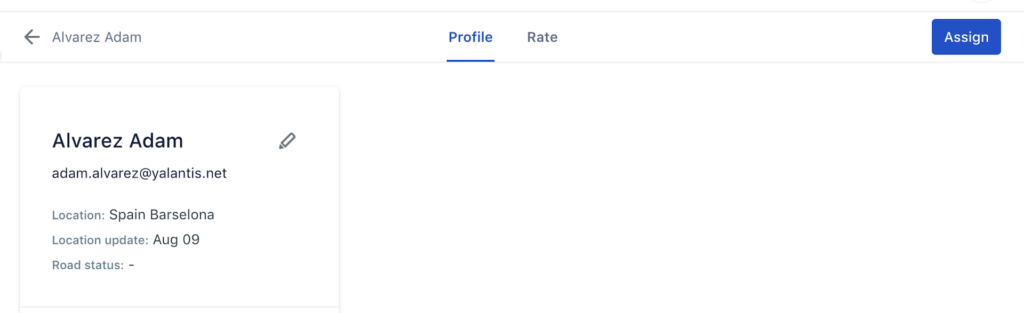
- Access the Admin Panel: The admin panel will appear on the right side of the page.
- Select the Project:
- Choose the relevant project from the project dropdown list.
- The Project Manager field will be automatically filled based on the selected project.
- Project Status field is filled with “Billable” value by default, but you can change it selecting the appropriate option. (see assignment statuses overview)
- Set Start and End Dates:
- Use the date pickers to select the Start Date and End Date for the associate’s assignment.
- Set Loading Hours per Week: Enter the number of hours per week the associate will be loaded onto the project.
- Leave a Comment (Optional): Add any comments if necessary.
- Set the Rate:
- Project Rate: Select this if the standard project rate applies.
- Custom Rate: Choose this option if the external rate for this assignment differs from the standard project rate.
- Click “Assign”: Once all information is filled out, click the “Assign” button to finalize the assignment.
By completing these steps, the created assignment is displayed on the Planner.
Please be careful with the total loading value for associates per week, it isn’t recommended to set it a value that more than 40 hours per week.
Create and Accept requests
This flow is also can be used for the creation of the first assignment for new Associates. Furthermore, using this flow, you can create several requests for any number of members for one project.
| ℹ️The following permissions are needed there: Request and release a team member View all requests and releases or View only my requests and releases Edit requests and releases (on demand) Set resolution of the requests and releases |
- Create a request if it wasn’t done before (see guide)
- If a request already exists on the Availability-> Requests, you need to approve it for assignment creation
- Go to Availability -> Requests
- Find needed request
- Hover on it and the Accept button appears
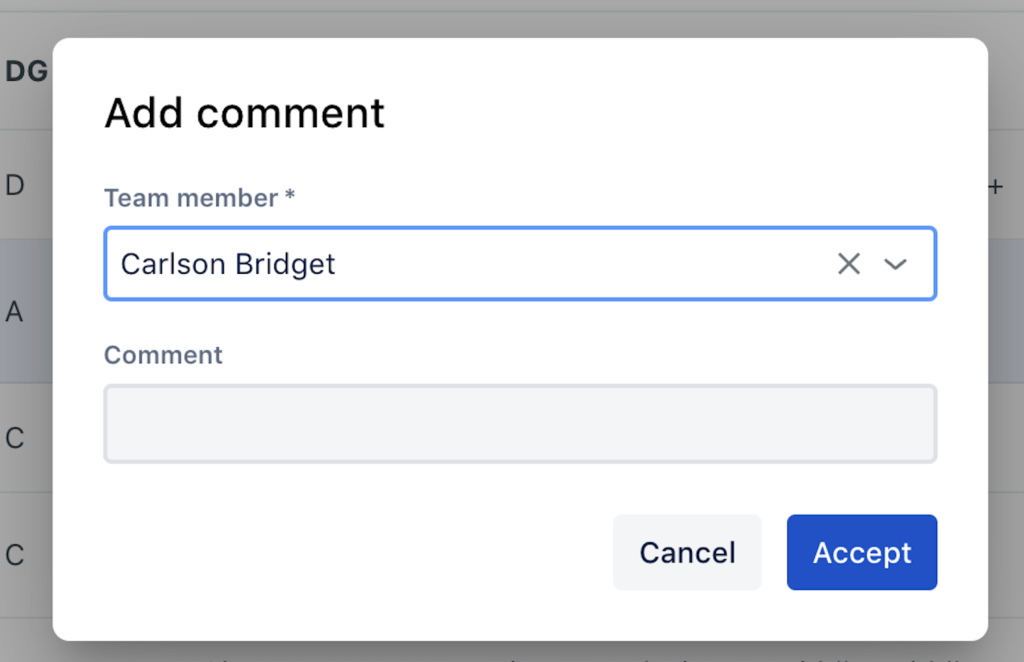
- Click on the button “Accept”
- Select a member and leave a note
- Click Accept
- The assignment will be created immediately for the member of the Planner. The period, assignment status, and loading will be automatically taken from the request.
Removing an assignment
| ℹ️The following permissions are needed there: View Planner Manage ERP members View profiles of ERP members Remove all assignments |
- Navigate to the Planner: Start by going to the “Planner” section within the ERP.
- Find the Assignment: Locate the assignment you want to remove. You can scroll through or use the search function to find it.
- Select the Assignment:
- Click on the assignment row in the Planner.
- The admin panel will appear on the right side of the page.
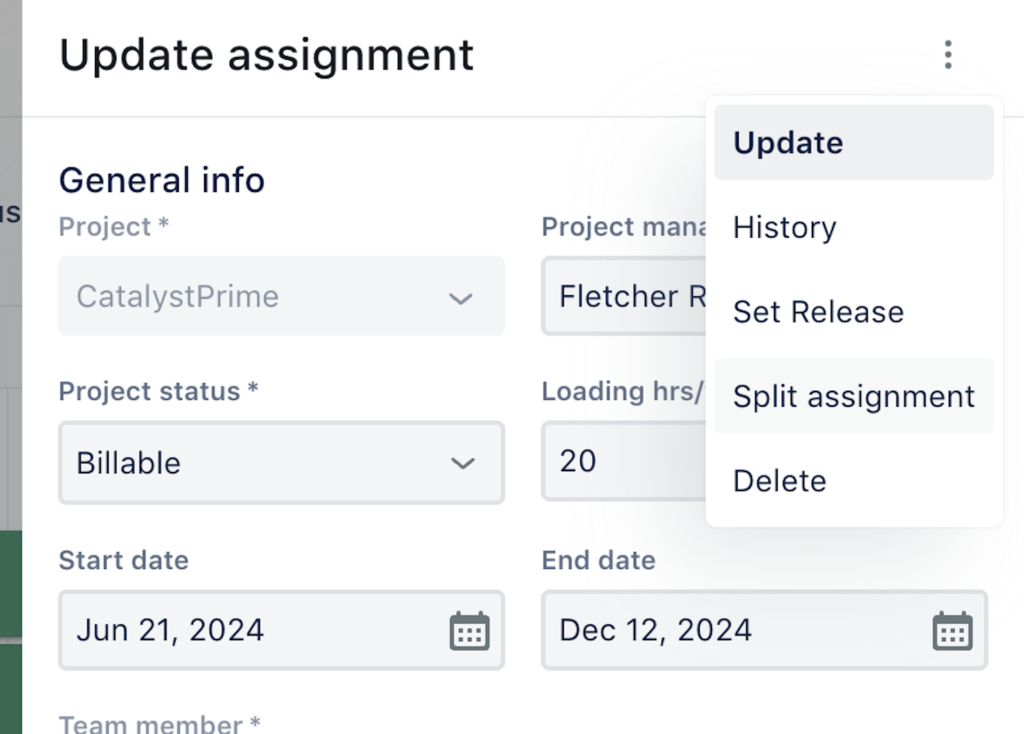
- Open the Options Menu:
- In the admin panel, click on the burger menu (three vertical dots) in the top-right corner.
- Select the Delete Option: Choose “Delete” from the dropdown menu.
- Confirm Deletion: A confirmation prompt will appear. Confirm to delete the assignment.
- Verify Removal: The assignment will disappear from the Planner, indicating that it has been successfully removed.
Steps to Split an Assignment
- Go to the Planner: Navigate to the “Planner” section.
- Find the Assignment: Locate the assignment you want to split.
- Click on the Assignment: Select the assignment by clicking on its row.
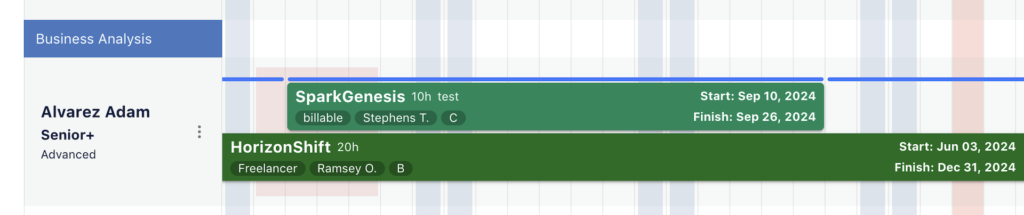
- Open the Admin Menu: The admin menu will open on the right side of the page.
- Click on the Burger Menu: In the top-right corner of the admin panel, click on the burger menu (three vertical dots) and select the “Split Assignment” option.
- Set New Dates:
- A modal window will appear. The start date for the first part and the end date for the second part will be pre-filled from the original assignment.
- Specify the new dates for each part of the assignment.
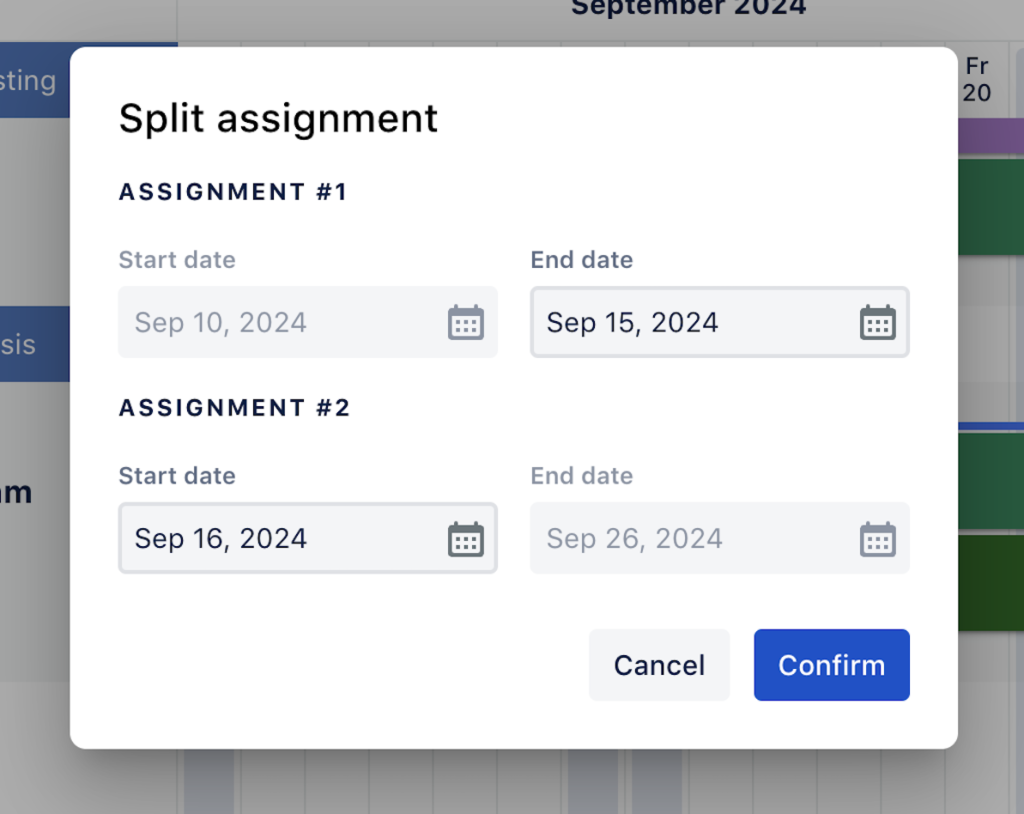
- Click “Confirm”: Once the new dates are set, click “Confirm” to split the assignment.
- Modify the Split Assignments: The original assignment is now split into two, and you can modify them separately as needed.
By following these steps, you can easily split an existing assignment and manage the resulting assignments individually.